Don’t forget to train for the down
July 31, 2018 | Posted in: JHMG
By JHMG Senior Guide Matt Shove
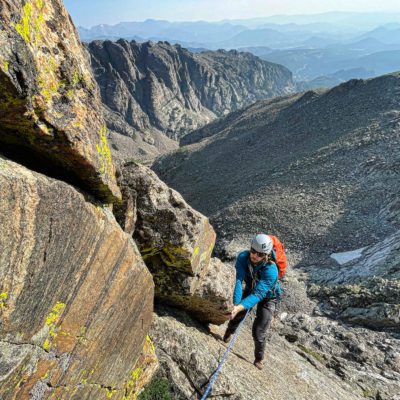
For months prior to a climb with us at Jackson Hole Mountain Guides, many of our clients spend hours every week training. Climbers seem to spend their training time focused on the uphill. That’s great, and necessary, however, we often find that some time focused on the downhill trajectory is VERY helpful. Remember, going up a Teton peak is roughly 60% of the work. The other 40% occurs on the return trip when you are already tired and have been awake and moving for 6 to 12 hours.
Whether the workout is in the gym or running down the bike path, there are a few things you can do to make your trip more comfortable for you and your climbing partners. You want to start training a full 8-12 weeks prior to your trip. Think of these tips as an investment in yourself to support your climbing goals.
MENTAL PREPARATION
First of all, mentally prepare to do some hard things. Recently, I climbed the Pownall-Gilkey route with Joe, a local here in the Tetons. When we arrived on the summit, he says to me “Matt, I can’t really think of a word to describe this! It’s just ………….” I replied “uhh, it’s just hard!”. Joe says “YES!!!! That’s it!”. Climbing mountains is a lot of fun, but scrambling over rocks and cliffs, using crampons on the firm morning snow, covering ground, and getting to the top will expend some calories.
KEEP YOUR MOMENTUM
When you hike downhill, it’s ok to try to go fast. I’m not talking about running, but just swift, continuous movement. Some areas will require more attention and time. Areas such as boulders, or rocky zones simply take longer to cover. That’s OK. Try to make up time on the flatter, dusty trail sections. Let your momentum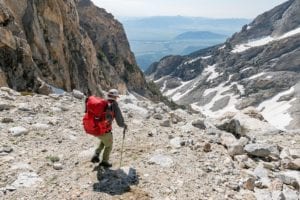 help carry you. Fighting gravity and momentum seem to make me more tired and sore. I feel as though I am fighting myself and gravity. Obviously, do this within reason. This helps to build your agility and puts that mountain chassis to work.
MULTI-SURFACE TRAINING
Practice hiking downhill in loose gravely type areas. The Tetons have a nickname – ”the Scree-tons”. There is no shortage of loose small rocks in the alpine zones. Getting used to it before you get here will increase your confidence and mountain mobility. Think about your body position as well- nose over knees, knees over toes. That puts you in a strong athletic stance that helps to use your quads as shock absorbers. It keeps you in balance as well.
USE A POLE
If you use trekking poles, consider using just one. I find that two poles require more mental energy. One is good for balance and additional support, but two is simply too much. I frequently find that I’m placing a hand down on a boulder to make a larger step. Two poles don’t allow you to do this as easily. No wrist loop either.
Your weekly workout or training plan could look something like this:
Days 1 and 2 – Spend an hour or more hiking with a pack on. This pack should be 25-30 pounds for the uphill portion. A ski hill, stadium steps, or even a hilly hiking trail should be sufficient. Work up to 3,000’ of elevation gain. Most of our approaches gain 3000-4000 feet in elevation before we ever start climbing. On the downhill, I recommend that you pack is lighter. Ten pounds of that pack weight can be in water. A trick is to fill up four to five liters of water, then dump it out for the way down. This will help to save your knees from getting too tired. Fifteen pounds of gear should be plenty to train your legs for any descent. This is a tried and true strategy that alpinists the world over have used for years. Give it a try. Try to do this two times a week. Some good tunes in your ear buds can help. This is also mental training. Remember 3000-4000’ feet up equals 3000-4000’ back down.
Day 3 – Do some functional movements in the gym. I recommend getting familiar with the squat rack (front and back squats). Squats are the king of exercises. Deadlifts help balance out the legs (hamstrings and glutes). Walking lunges with dumb bells help develop balance and general strength. The next part should be hardening of the mountain chassis- that’s your trunk or core. Sit-ups, push-ups, pull-ups, planks, bird dogs, etc. Rowing some intervals or even good kettlebell swings will be helpful. An hour in the gym should be plenty for this. I like a gym that has no benches or mirrors- I don’t want to see how hard I’m working and I’m not there to sit down. Please keep in mind that it is worth seeking qualified strength training coaching if you haven’t spent much time in the weight room. Start light too. Don’t worry. You will not get bulky and heavy. Trust me on this.
Day 4 – This should be a full day’s hike covering eight to ten miles with up to 4000 feet of elevation gain. Do an out and back hike so you can hike back down to where you started. You may have to do some laps.
Day 5 – Go rock climbing! Or hit up the local rock gym for a couple of hours.
To wrap this up, remember that eccentric movement is the opposite of concentric movements. Going up is concentric, going down is eccentric. We go up for our heart and lungs, and down for our legs, so train them both. No one has ever complained that they were too strong for a Teton ascent. Don’t forget to take it easy the week before your climbing trip. A couple of days off and 3 active rest days after a taper should set you up well.
Matt Shove is a Senior Guide at JHMG and a AMGA Certified Rock Instructor: To request to climb with Matt, Click Here